Sound file
A sound file element in the STx project links a WAVE file on disk with any segments and parameters previously created in STx.
Analysing a sound file
If you want to analyse a sound file, do the following:
- load the sound file into STx
- select the sound file in either the Overview or the Detail
- select an analysis profile in the Application & Setup Tree
- press the run button or choose Run from the context menu.
Creating a sound file
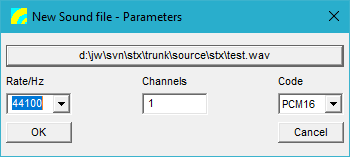
You can create a new sound file by selecting the menu item File > Sound File > New. You can also create a new sound file by adding a sound file to the project and choosing New instead of Open in the Add Sound File dialog. You must specify the sampling rate, number of channels and the audio format. Microsoft specifies the formats PCM8 and PCM16. However, it is possible to store the samples in 24, 32 and float format. Note that these non-Microsoft standard formats are not supported by all other applications.
Truncating a sound file
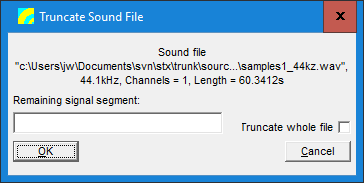
You can truncate a sound file to the posistion of a segment using the Special->Sound File->Truncate menu. Enter the name of the segment you would like to 'keep'. Note that the file which is currently selected in the Overview is truncated. Metadata addressing truncated parts of the signal are not removed.
If you wish to truncate the whole file (remove all signal data), check the Truncate whole file box.
Properties
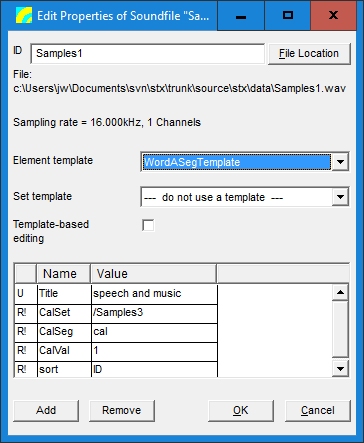
Editing a sound file in an STx project by selecting edit from the context menu will display the following dialog box:
Here you can edit the ID, select a template for editing and edit attribute value.
Note that STx currently only supports the Microsoft wave file format.


